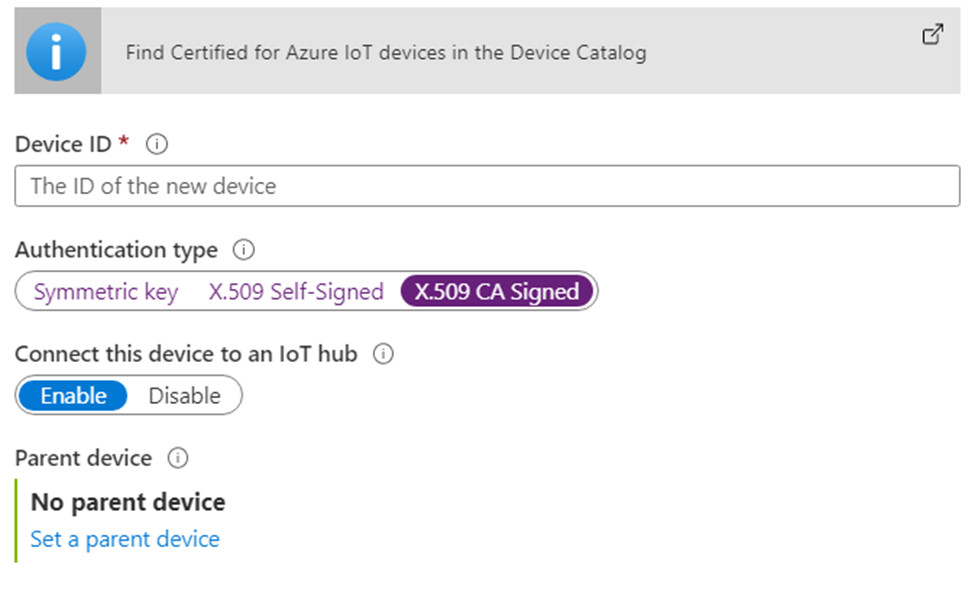
When adding a new IoT Device in an Azure IoT Hub, there are three types of authentication method. One of them is “X.509 CA Signed”. Before you purchase an X.509 certificate from a public root certificate authority, Entellio would recommend that you create one for testing beforehand. This article describes how to
1) Create your own CA root certificate
2) Create CA-Signed Certificates for your Azure IoT Devices
3) Upload the CA root certificate to Azure IoT Hub and verify proof-of-possession
4) Use mosquitto_pub and MQTT.fx to connect to the Azure IoT Hub
Prerequisites:
1) OpenSSL
2) mosquitto & MQTT.fx 1.7.1
3) An Azure IoT Hub
4) An IoT Device created with “X.509 CA Signed” chosen
5) Device ID of the IoT Device
1. Create your own CA root certificate
First, generate a private key:
Second, generate a certificate with the private key generated:
Now you can use “myiotCA.key” as the root private key and “myiotCA.pem” as the root CA certificate.
2. Create CA-Signed Certificates for your Azure IoT Devices
Since we already have the root key and certificate, let’s work on creating a private key, a CSR (Certificate Signing Request) file, and a CA-Signed certificate for your IoT Device.
First, create a private key:
Second, get the <device id> of your IoT Device created and then create a CSR file:
Third, create a CA-Signed certificate (you will need the pass phrase of the root key file) :
Now, you have the two files to use with MQTT.fx: myiotdevice.key (the private key) and myiotdevice.crt (the signed certificate). Before we test with MQTT.fx, we will need to upload the CA certificate to Azure IoT Hub.
3. Upload the CA root certificate to Azure IoT Hub and verify proof-of-possession
The official documentation on Microsoft website provides a clear view on how to upload the CA certificate file and verify the proof of possession of the CA certificate. Please perform the steps in the documentation until you get “Verification Code”. In the case below, you would get the code after click “Generate Verification Code” and the code in the case here is “33CEC508…….”:
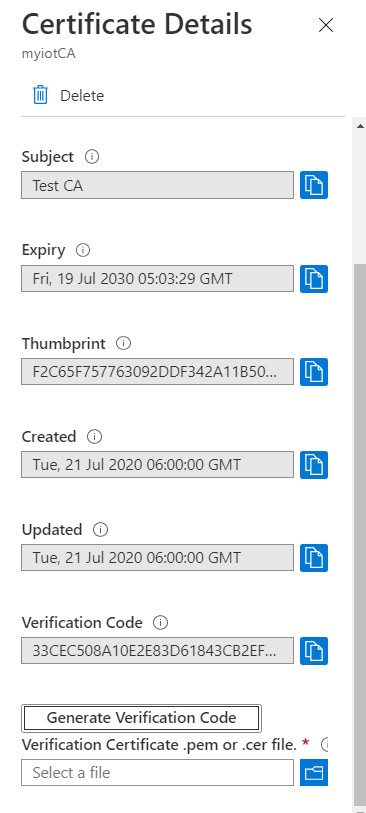
The code will be used in generating another CA-Signed certificate. We will enter the code as “Common Name” when creating the new CSR file. First, create a new private key:
Second, generate a new CSR with the verification code:
Now it is time to create the proof of possession certificate (you will need the pass phrase of “myiotCA.key”):
Upload “proof.pem”, click “Verify”. Now “myiotCA.pem” is verified. We are almost ready moving forward to testing.
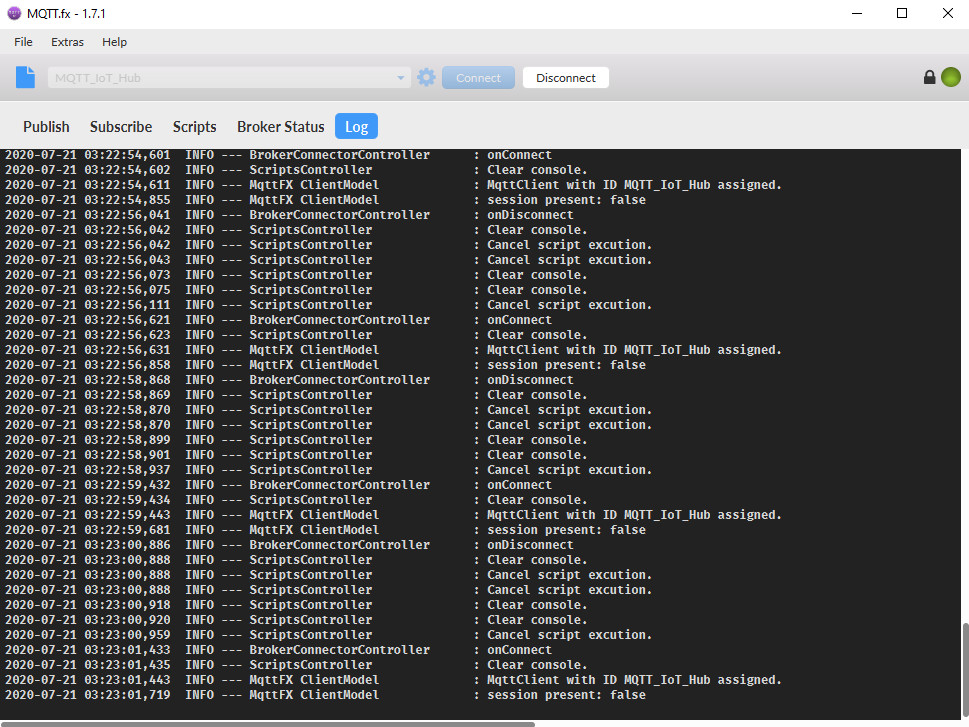
4. Use mosquitto_pub and MQTT.fx to connect to the Azure IoT Hub
Azure IoT Hub accepts telemetry over MQTT and requires TLSv1.2. Before we use mosquitto_pub and MQTT.fx to test, let’s create “IoTHubTest.cer” by copying the “DigiCert Baltimore Root” certificate which you can find from Azure-IoT-SDK-C:
Now, let’s start with mosquitto_pub (assuming you have had some experience connecting to IoT Hub over MQTT by SAS method):
*Some MQTT clients may not require a CA file to create connection (such as MQTT Explorer).
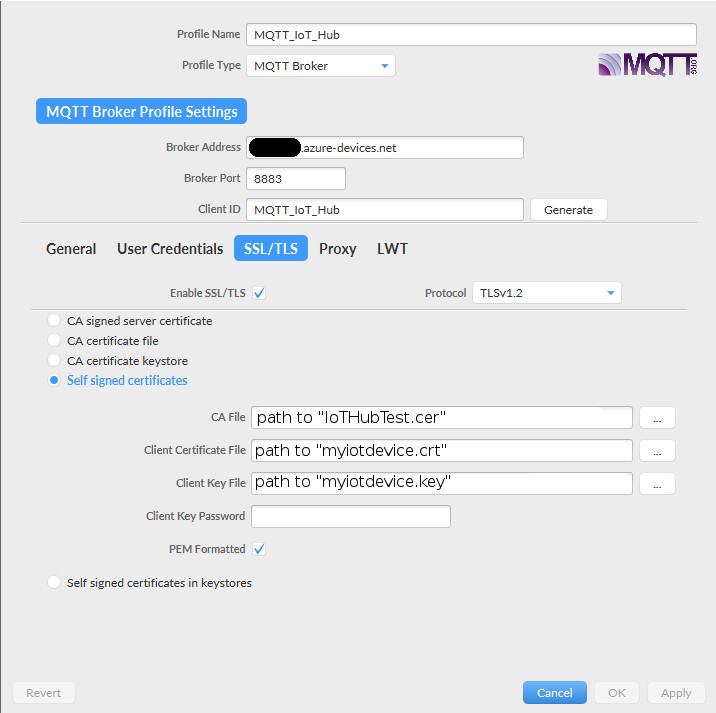
By using MQTT.fx the configuration looks like:
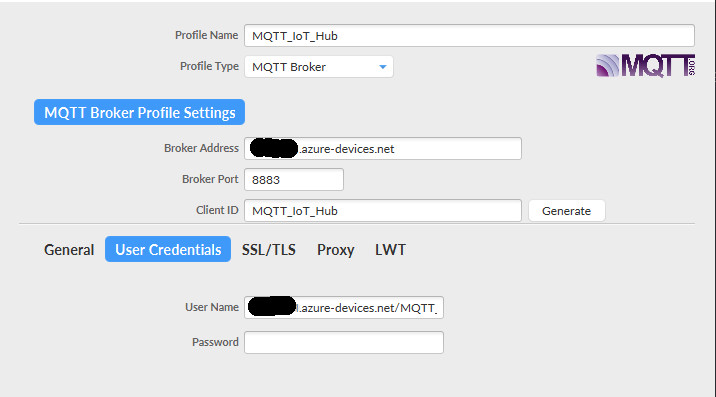
*The blackout areas should be filled in with <your IoT Hub name>
Then you are ready to manually send messages to your Azure IoT Hub